Book a Free Consultation Now
Would you like to know more about this topic?
Contact us on WhatsApp and get a free consultation from our experts
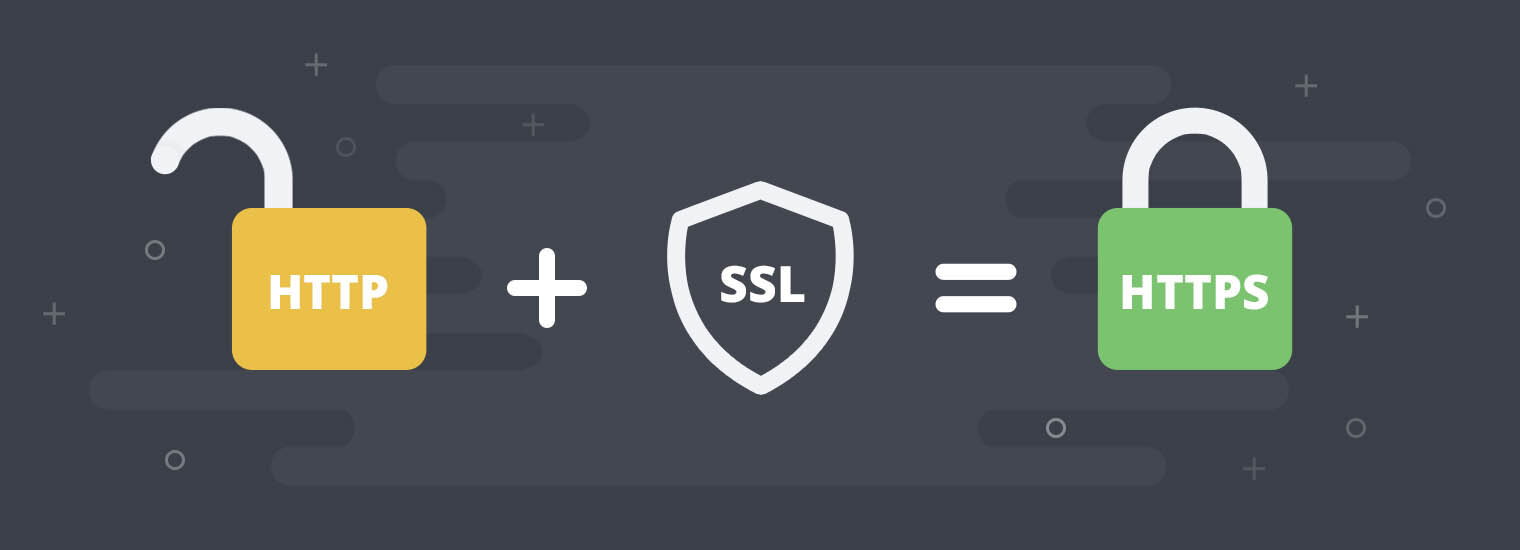
Contact on WhatsApp NowAdd ssl for free means securing your website by enabling HTTPS without paying for a certificate, usually through trusted providers like Let’s Encrypt, Cloudflare, or ZeroSSL. The process typically includes choosing a free SSL provider, verifying domain ownership, installing the certificate, and forcing HTTPS across all pages to protect user data, remove browser security warnings, and improve search engine rankings. Because SSL is now a ranking and trust factor, proper implementation is critical, and that’s where Nofal SEO helps businesses secure their websites correctly while aligning SSL setup with SEO best practices for long-term growth.
SSL/TLS Certificates
SSL/TLS Certificates are the foundation of secure communication on the internet. They encrypt the data transferred between a user’s browser and the web server, preventing hackers, third parties, or attackers from intercepting sensitive information such as passwords, payment details, or personal data. TLS is the modern and more secure version of SSL, but the term “SSL” is still widely used.
Installing an SSL/TLS certificate is no longer optional. Modern browsers actively warn users when a website is not secured with HTTPS, which can significantly reduce trust, traffic, and conversions.
Add ssl for free allows websites to encrypt data exchanged between users and servers using SSL/TLS certificates, ensuring secure communication and protecting sensitive information from interception or attacks.A highly searched keyword in this area is SSL/TLS security explained, which targets users looking to understand how encryption builds trust and credibility for modern websites.
Free SSL Certificates & Wildcard SSL Certificates in Minutes
Free SSL certificates allow website owners to secure their sites without paying for expensive yearly plans. These certificates are usually domain-validated (DV) and can be issued within minutes using automated systems like ACME.
Wildcard SSL certificates are especially useful because they secure the main domain and all its subdomains at once (for example: *.example.com). Many free providers now offer wildcard certificates, making it easier than ever to protect complex website structures.
With modern tools, you can Add ssl for free and secure single or multiple subdomains quickly using free and wildcard SSL certificates without complex technical steps. The keyword free wildcard SSL certificate attracts businesses managing multiple subdomains and looking for fast, scalable security solutions provided by experts like Nofal SEO.
Steps to get Free SSL or Wildcard SSL in minutes:
-
Choose a Free SSL Provider
Select a trusted provider that supports free and wildcard SSL certificates, such as Let’s Encrypt, ZeroSSL, or Cloudflare. -
Verify Domain Ownership
Complete domain validation using DNS records (required for wildcard SSL), HTTP file upload, or email verification. -
Request the Certificate
Generate the SSL or wildcard SSL certificate through the provider’s dashboard or via ACME automation. -
Install or Activate the Certificate
Install the certificate on your hosting server or activate it directly if using a cloud-based provider. -
Enable HTTPS
Force HTTPS across all pages to ensure secure connections and avoid browser warnings.
Widely Trusted SSL Certificates
A widely trusted SSL certificate is one that is recognized by all major browsers and operating systems, such as Google Chrome, Firefox, Safari, and Edge. Trust comes from the Certificate Authority (CA) that issues the certificate.
Free SSL certificates from providers like Let’s Encrypt, Cloudflare, and ZeroSSL are trusted by more than 99% of browsers worldwide, making them safe for commercial and personal websites alike.
Website owners can Add ssl for free using certificates that are already trusted by major browsers, eliminating security warnings and improving user confidence instantly. A common keyword here is trusted SSL certificate, which is essential for businesses aiming to establish authority and trust in competitive online markets.
Add ssl for free on Your Website
Adding SSL for free means securing your website without additional hosting costs. Today, multiple platforms allow you to enable HTTPS even if your hosting provider does not offer built-in SSL.
You can Add ssl for free on your website by choosing a reliable provider and configuring HTTPS correctly to secure all pages and protect visitor data. The keyword install free SSL certificate is frequently searched by site owners who want a secure setup without increasing hosting costs.
The general process includes:
-
Choosing a free SSL provider.
-
Verifying domain ownership.
-
Installing or activating the certificate.
-
Forcing HTTPS across the website.
The exact steps depend on the method you choose, which we will explain below.
How to Add ssl for free Step by Step
Learning how to Add ssl for free step by step helps beginners avoid configuration mistakes while ensuring proper HTTPS activation across their entire website. A valuable keyword is how to install SSL step by step, which supports clear guides and professional implementation through Nofal SEO services.
To Add ssl in a safe and reliable way for free, follow these general steps:
-
Choose an SSL Provider
Select a trusted free provider such as Cloudflare, ZeroSSL, or Let’s Encrypt. -
Verify Domain Ownership
This is usually done via DNS records, email verification, or HTTP file upload. -
Activate the Certificate
Once verified, the SSL certificate is issued automatically. -
Enable HTTPS
Redirect all HTTP traffic to HTTPS to avoid security warnings. -
Test the Configuration
Visit your site and confirm the browser padlock is active.
Best Ways to Add SSL for Free in 2026
In 2026, website owners can Add ssl for free using updated tools and automation methods that offer stronger encryption and easier renewal processes. The keyword best free SSL providers 2026 reflects future-focused search intent for long-term, reliable website security.
In 2026, the most reliable ways to add SSL include for free:
-
Cloud-based SSL (Cloudflare)
-
ACME-based SSL (Let’s Encrypt & ZeroSSL)
-
CMS-integrated SSL (WordPress plugins + hosting support)
The best option depends on your technical skills, hosting environment, and website type. Below, we explain each method in detail.
Add ssl for free Using Cloudflare
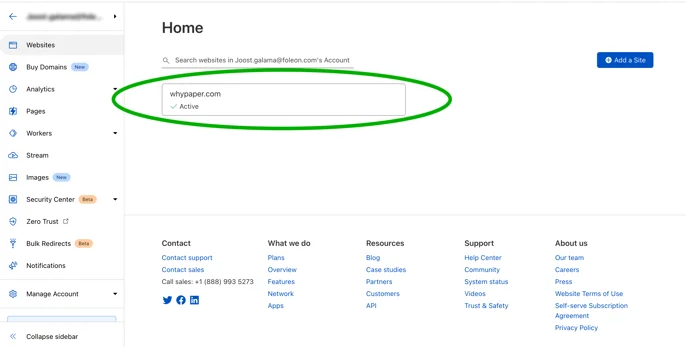
You can Add ssl for free using Cloudflare by activating Universal SSL after pointing your domain’s DNS, securing your site without server-side changes. A popular keyword is Cloudflare free SSL setup, especially for businesses that want performance and security combined in one solution.
Steps:
-
Create a free Cloudflare account.
-
Add your website domain.
-
Select the Free plan.
-
Update your domain’s nameservers to Cloudflare’s nameservers.
-
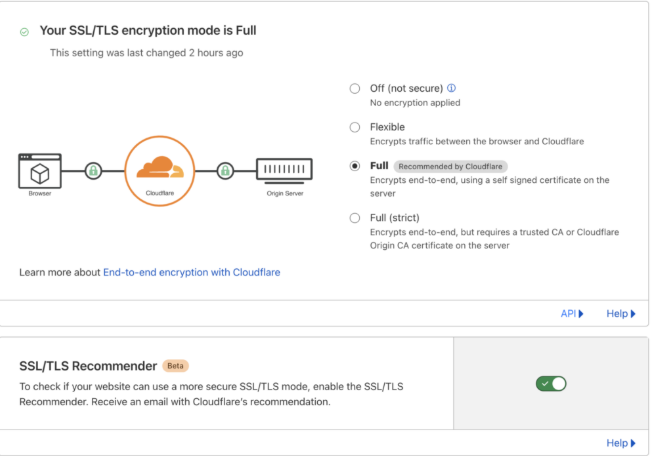
Go to SSL/TLS settings.
-
Enable SSL (Flexible, Full, or Full Strict depending on your server).
-
Turn on Always Use HTTPS.
Cloudflare instantly provides HTTPS and also improves performance through its global CDN.
Add ssl for free Without Hosting Control Panel
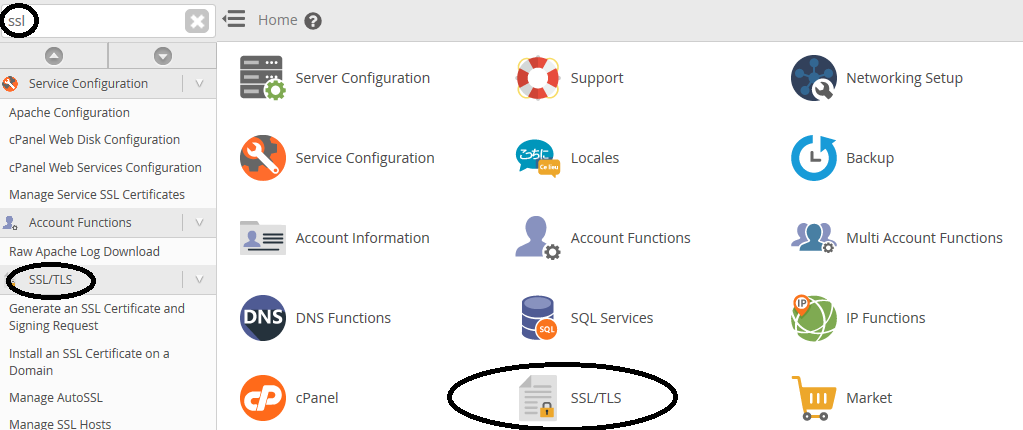
It is possible to Add SSL for Free even without access to a hosting control panel by using DNS validation or external SSL services. The keyword free SSL without cPanel targets users facing hosting limitations who still want full HTTPS protection.
If you don’t have access to cPanel, Plesk, or any hosting control panel, you can still add SSL.
How it works:
-
Use a DNS-based SSL provider (like Cloudflare).
-
SSL is applied at the network level, not the server level.
Steps:
-
Point your domain’s DNS to the SSL provider.
-
Activate SSL from their dashboard.
-
Force HTTPS redirects.
This method is ideal for VPS users, static websites, or restricted hosting environments.
Add ssl for free to WordPress Website
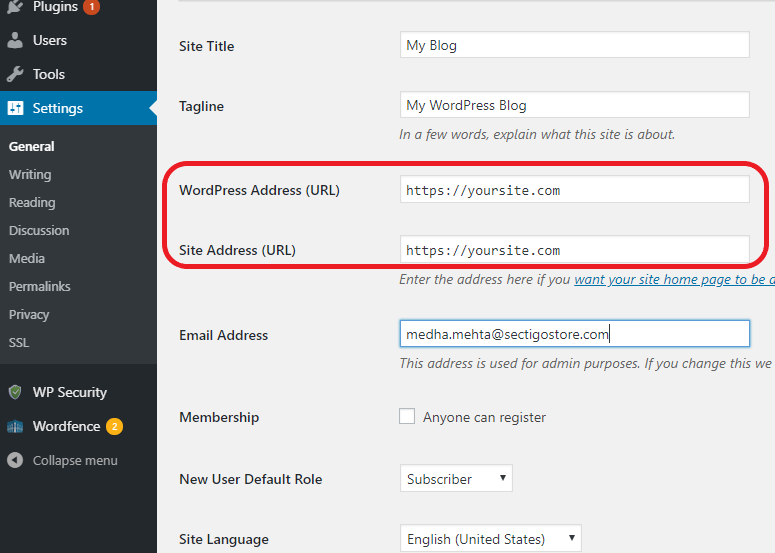
WordPress users can Add ssl for free by installing a free certificate and configuring HTTPS through plugins or built-in settings. The keyword WordPress free SSL plugin is highly searched and often implemented safely with guidance from Nofal SEO.
WordPress websites can enable SSL easily using free certificates.
Steps:
-
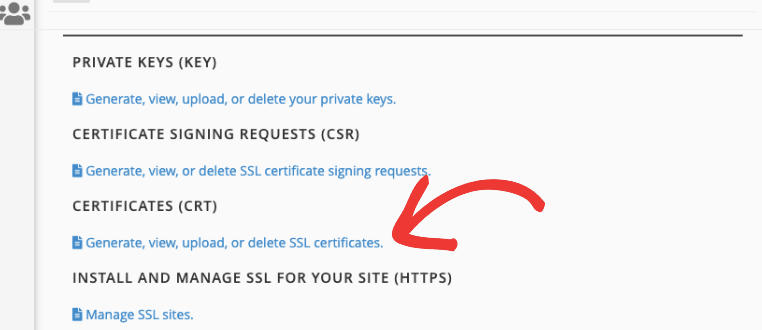
Activate a free SSL from your hosting panel or provider.
-
Install an SSL plugin (optional).
-
Update WordPress Address and Site Address to HTTPS.
-
Fix mixed content issues.
-
Force HTTPS redirects.
Most modern WordPress hosting providers include Let’s Encrypt by default.
Add ssl for free with ZeroSSL
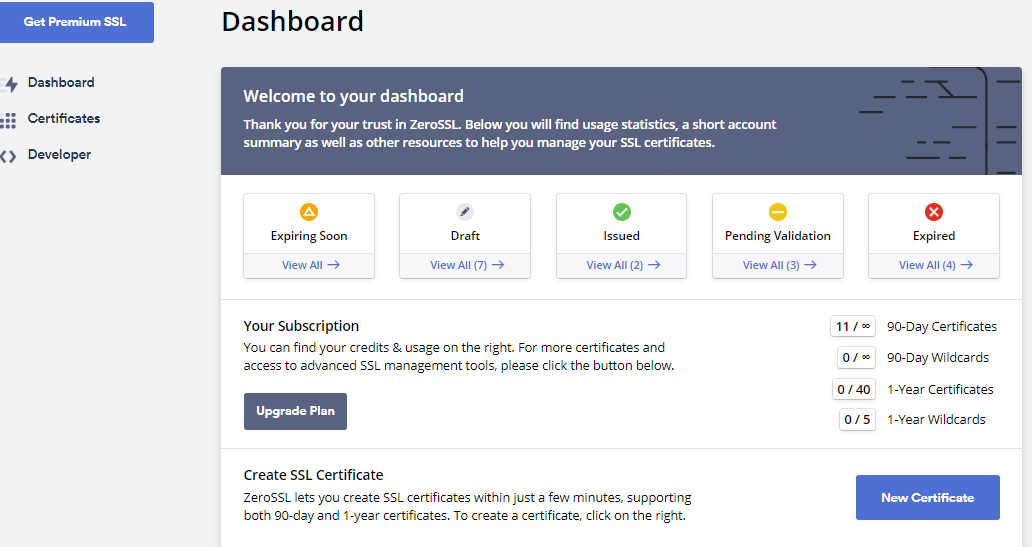
You can Add ssl for free with ZeroSSL by generating certificates manually and validating ownership through flexible verification methods. A strong keyword here is ZeroSSL free certificate, appealing to users seeking alternatives to automated SSL providers.
ZeroSSL offers free 90-day SSL certificates that can be renewed.
Steps:
-
Create a ZeroSSL account.
-
Enter your domain name.
-
Choose a verification method (DNS or HTTP).
-
Complete domain validation.
-
Download and install the certificate on your server.
-
Set up auto-renewal if available.
ZeroSSL is ideal for users who prefer direct certificate control.

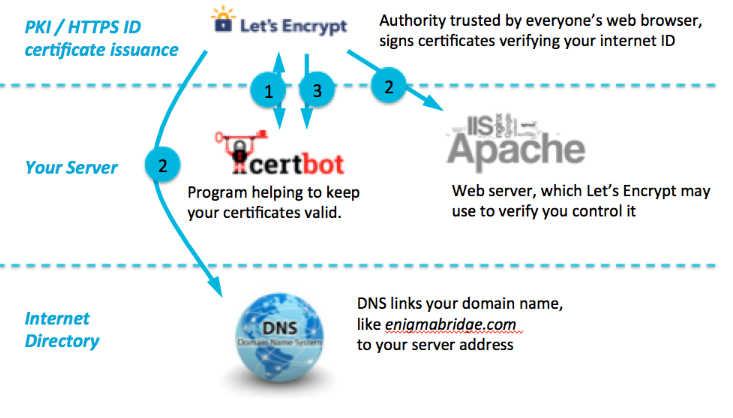
Add ssl for free Using Let’s Encrypt
With Let’s Encrypt, website owners can Add ssl for free using automated issuance and renewal supported by most modern hosting platforms. The keyword Let’s Encrypt SSL setup is essential for correct installation and long-term certificate management.
Let’s Encrypt is the most popular free SSL provider in the world.
Steps:
-
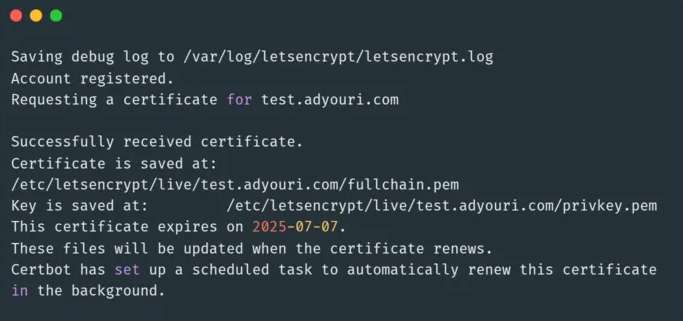
Install Certbot on your server.
-
Run the Certbot command for your web server.
-
Complete automatic domain verification.
-
Enable HTTPS automatically.
-
Set auto-renewal (every 90 days).
This method is best for VPS and dedicated server environments.
Add SSL for Free and Enable HTTPS
After you Add ssl for free, enabling HTTPS ensures all site traffic is redirected securely and avoids mixed content warnings. A commonly searched keyword is enable HTTPS redirect, which is crucial for maintaining browser trust signals.
Adding SSL alone is not enough—you must enable HTTPS.
Steps:
-
Confirm SSL is active.
-
Set HTTP → HTTPS redirects.
-
Update internal links.
-
Fix mixed content.
-
Test all pages.
Without this step, browsers may still show security warnings.

Add SSL for Free and Improve SEO
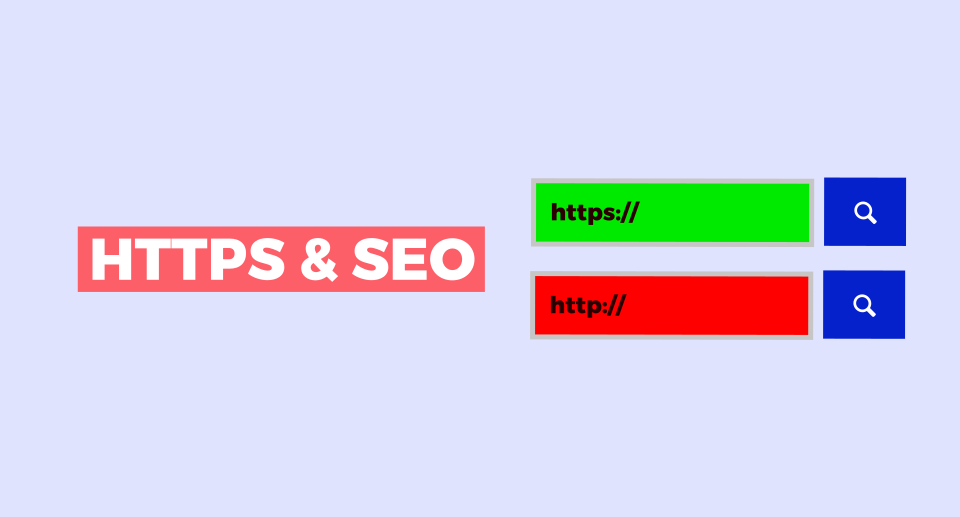
When you Add ssl for free, you directly support better SEO performance by meeting Google’s security standards and improving user experience. The keyword SSL impact on SEO is frequently searched by businesses aiming to boost rankings with professional strategies from Nofal SEO.
Benefits:
-
HTTPS is a Google ranking signal.
-
Increased trust improves user engagement.
-
Secure pages reduce bounce rates.
-
Better conversion rates for forms and e-commerce.
Search engines favor secure websites, making SSL essential for modern SEO strategies.
If you’re ready to Add ssl for free the right way and avoid security or SEO mistakes, expert support can save you time and risk. With professional free SSL certificate installation and HTTPS optimization, Nofal SEO helps businesses secure their websites, build trust, and improve search rankings. Contact us today and make your website fully secure and SEO-ready.
Do you need a consultation about this topic?
Contact on WhatsApp