Book a Free Consultation Now
Would you like to know more about this topic?
Contact us on WhatsApp and get a free consultation from our experts
Contact on WhatsApp NowCustom audiences in Facebook ads are audiences that have previously interacted with your ads and are strategically retargeted to drive higher conversions. This is a core approach implemented by Nofal SEO, where we focus on reconnecting brands with users who already showed interest, resulting in stronger engagement and better performance compared to targeting completely new audiences with no prior connection.
Targeting Custom Audiences in Facebook Ads
Targeting custom audiences in Facebook ads allows advertisers to reach users who have already interacted with their brand, making campaigns more relevant, cost-efficient, and conversion-focused.
This targeting approach is widely used by Nofal SEO to reduce wasted ad spend and improve return on investment across Meta advertising platforms.
What Are Custom Audiences in Facebook Ads?
Custom audiences in Facebook ads are built from first-party data collected through real user interactions.
-
They include website visitors, app users, customer lists, and engagement across Meta platforms.
-
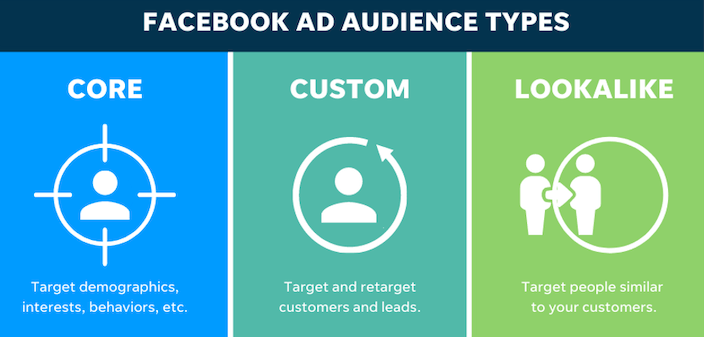
This targeting method focuses on warm audiences, not cold traffic.
-
Custom audiences in Facebook ads are primarily used for retargeting and remarketing campaigns.
-
They help advertisers reconnect with users who already recognize the brand and are closer to conversion.
Types of Custom Audiences You Can Target
1️⃣ Website Custom Audiences
Website-based custom audiences in Facebook ads are built using Meta Pixel or Conversions API (CAPI).
-
Target users based on on-site behavior such as page visits or specific events.
-
Ideal for retargeting product viewers or pricing page visitors.
2️⃣ Customer List Audiences
Customer list–based custom audiences in Facebook ads are created by uploading email addresses or phone numbers.
-
Used for re-engaging existing customers or leads.
-
Commonly applied in upselling and cross-selling campaigns.
3️⃣ Engagement-Based Custom Audiences
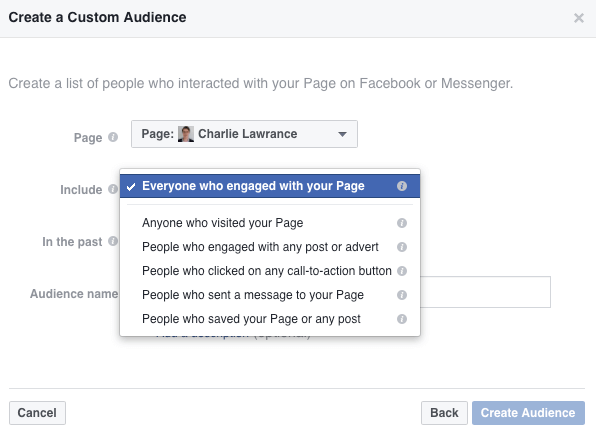
These custom audiences in Facebook ads are built from interactions on Facebook and Instagram.
-
Include users who liked, commented, shared, or clicked ads or posts.
-
Suitable for mid-funnel nurturing campaigns.
4️⃣ Video Engagement Audiences
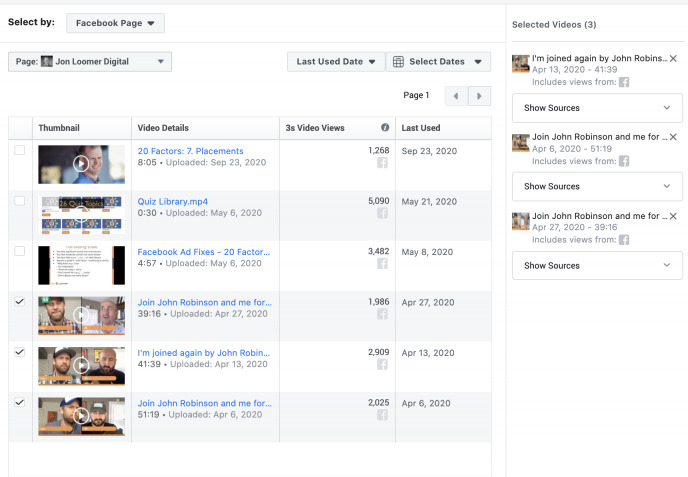
Video-based custom audiences in Facebook ads target users who watched a specific percentage of your videos.
-
Higher watch percentages indicate stronger intent.
-
Effective for awareness-to-conversion remarketing.
5️⃣ Lead Form Audiences
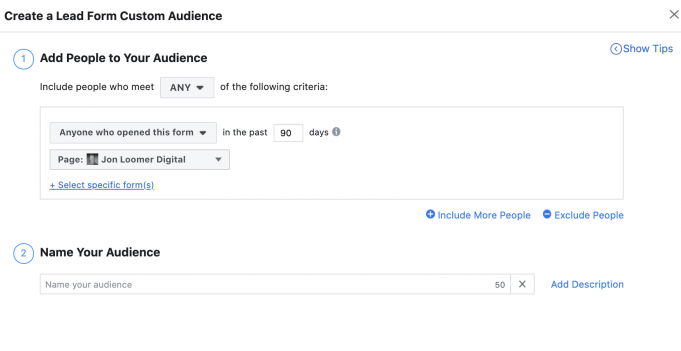
Lead-based custom audiences in Facebook ads are built from users who interacted with Meta lead forms.
They can target:
-
Form openers
-
Form submitters
-
Users who abandoned forms
These audiences are ideal for structured lead follow-up and nurturing.
How Targeting Custom Audiences Improves Ad Performance
Using custom audiences in Facebook ads consistently delivers measurable performance improvements:
-
Increases ad relevance and engagement rates
-
Lowers Cost Per Acquisition (CPA)
-
Improves Return on Ad Spend (ROAS)
-
Shortens the customer decision-making cycle
-
Reduces wasted ad spend on uninterested users
Best Practices for Targeting Custom Audiences
At Nofal SEO, we apply structured best practices when managing custom audiences in Facebook ads:
-
Segment audiences based on user intent and funnel stage
-
Use shorter retention windows for high-intent actions
-
Exclude converted users from acquisition campaigns
-
Test different custom audiences before scaling budgets
-
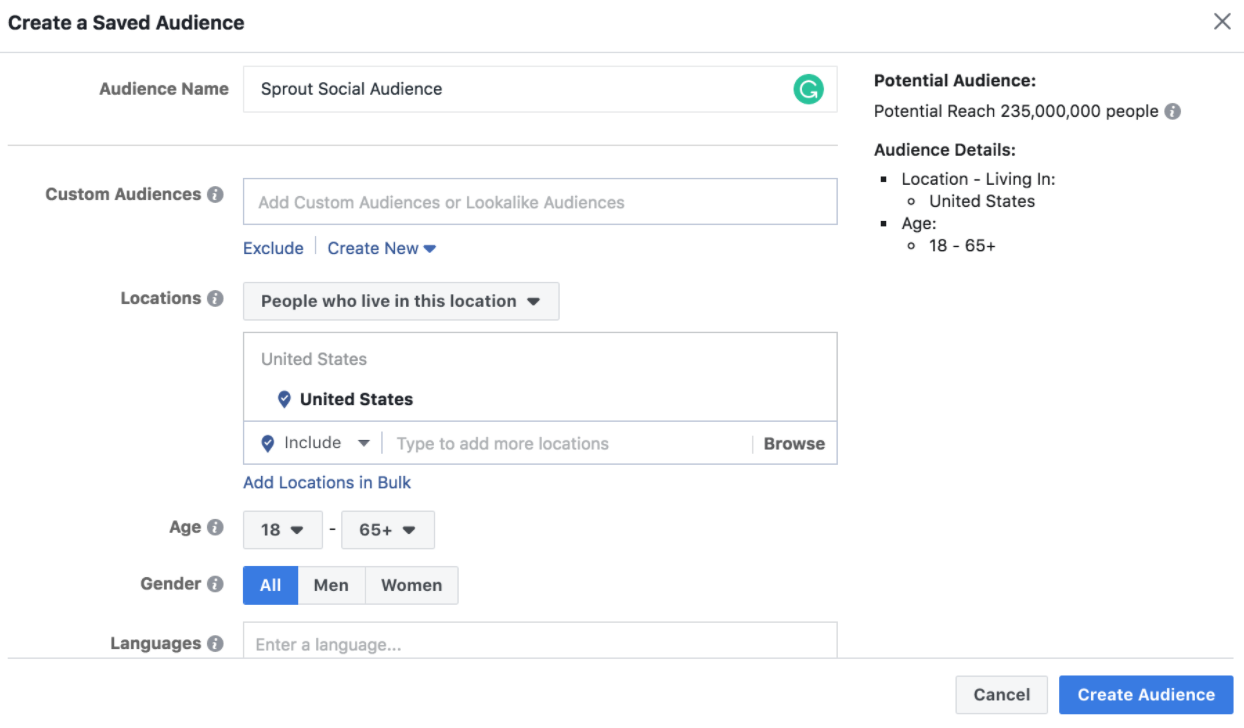
Combine custom audiences with lookalike audiences for scalable growth
SEO Tip for Content Optimization
When creating content about custom audiences in Facebook ads, it’s important to focus on:
-
Semantic keywords (retargeting, warm audiences, Meta Ads targeting)
-
Clear H2 and H3 structure
-
Short bullet points for readability
-
Visual step-by-step images to increase time on page
What Does It Mean When Someone Chooses a Custom Audience on Facebook?
When an advertiser chooses a custom audience, they are selecting a predefined group of users who have previously interacted with their brand.
This includes users who:
-
Visited the website
-
Engaged with ads or posts
-
Submitted a lead form
-
Are existing customers
This approach improves relevance, lowers ad costs, and increases conversion rates.
Who Can See Custom Audiences on Facebook?
Custom audiences in Facebook ads are not publicly visible.
They can only be accessed by:
-
The ad account owner
-
Authorized users with ad account permissions
Facebook users cannot see whether they are part of a custom audience, and advertisers cannot see personal identities—only aggregated audience data.
How to Add a Custom Audience in Facebook Ads
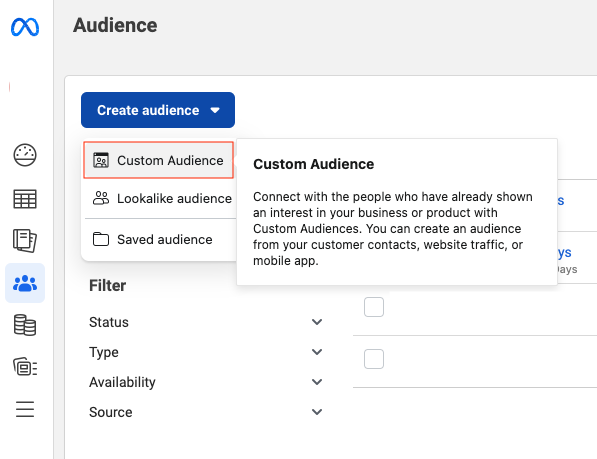
To create custom audiences in Facebook ads, follow these steps:
-
Go to Meta Ads Manager
-
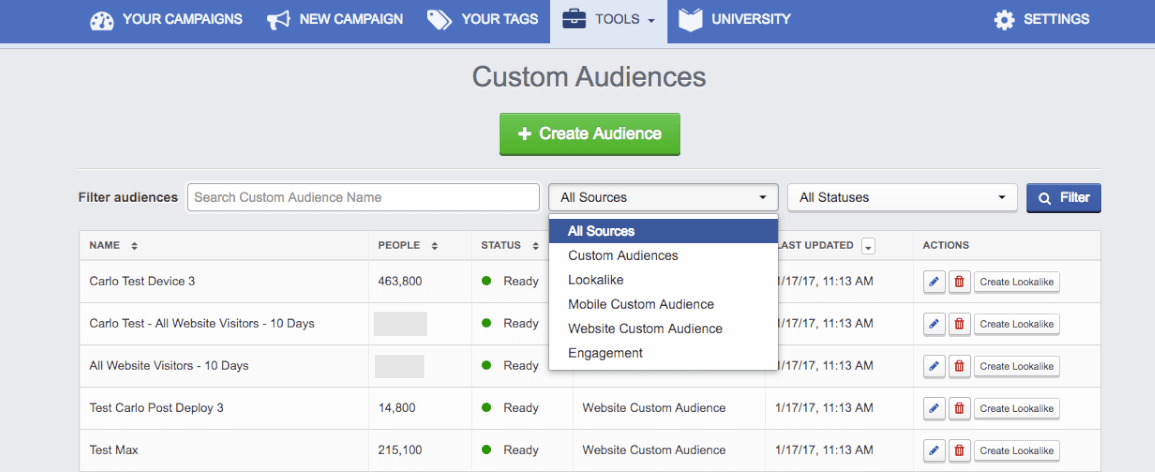
Navigate to All Tools → Audiences
-
Click Create Audience
-
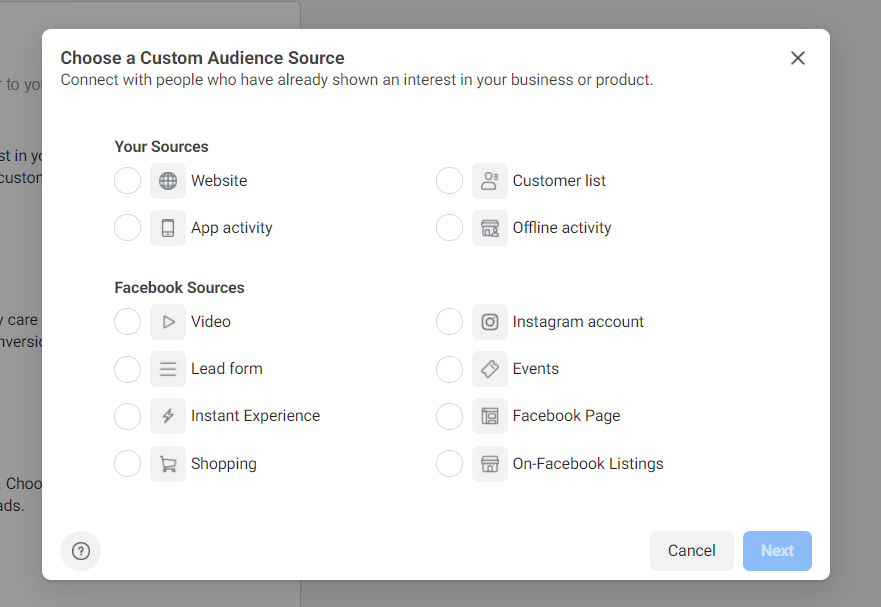
Select Custom Audience
-
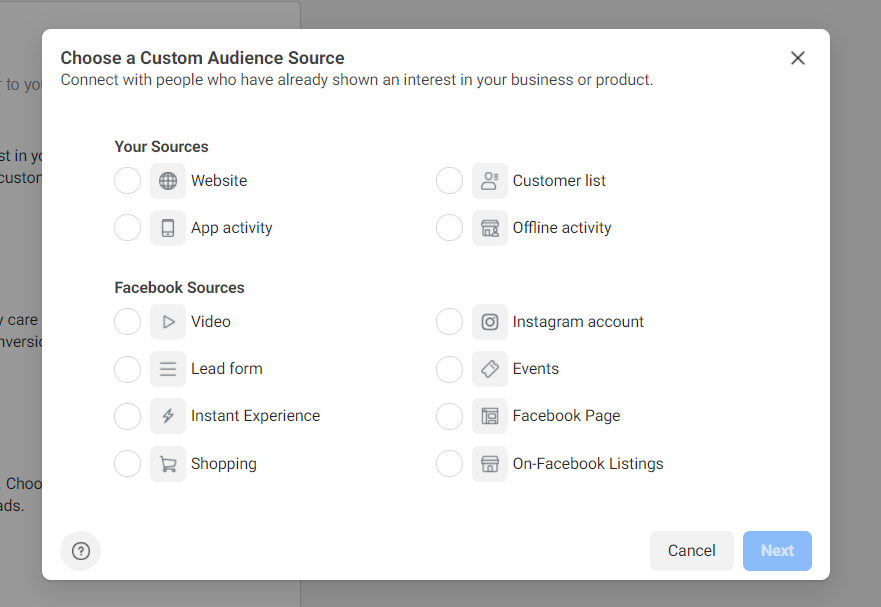
Choose the source (Website, Customer List, App Activity, or Engagement)
-
Configure events, retention period, and exclusions
-
Name the audience and click Create Audience
Once created, Facebook begins collecting data until the audience reaches a usable size
Meta Custom Audiences
Meta custom audiences extend custom audiences in Facebook ads across:
-
Facebook
-
Instagram
-
Messenger
-
Audience Network
They are built from website activity, app activity, and engagement data, allowing consistent cross-platform remarketing strategies managed by Nofal SEO.
Facebook Custom Audience List
A Facebook custom audience list is created by uploading:
-
Email addresses
-
Phone numbers
Facebook hashes and encrypts the data to protect privacy. These custom audiences in Facebook ads are ideal for loyalty, retention, and customer reactivation campaigns.
Facebook Custom Audiences Privacy
Facebook custom audiences follow strict privacy and data protection policies:
-
Advertisers cannot see personal user identities
-
User data is encrypted and processed in aggregated form
-
Access is limited to authorized ad account users
-
Custom audiences comply with Meta’s data usage policies
-
Advertisers must have legal permission to use customer data
How to Add a Custom Audience in Facebook Ads
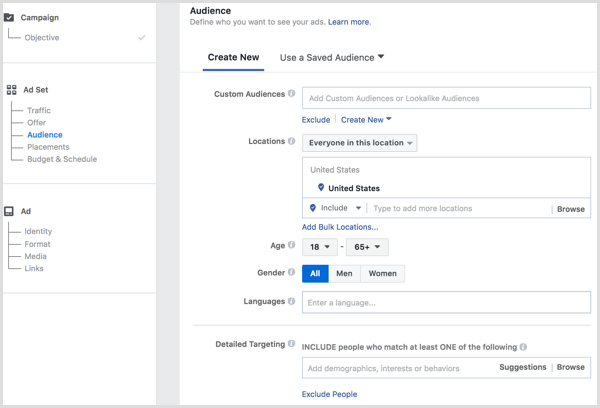
To add a custom audience in Facebook Ads, follow these steps carefully inside Meta Ads Manager:
Step-by-Step Guide
-
Go to Meta Ads Manager
Log in to your ad account and open Meta Ads Manager. -
Navigate to Audiences
From the main menu, click:
All Tools → Audiences -
Click “Create Audience”
Choose Custom Audience from the available options. -
Select the Audience Source
Choose where your audience data will come from, such as:-
Website (Meta Pixel or CAPI)
-
Customer List (emails or phone numbers)
-
App Activity
-
Engagement (Facebook, Instagram, video, lead forms)
-
-
Configure Audience Settings
-
Select events (page visits, actions, interactions)
-
Set the retention period
-
Add inclusions or exclusions if needed
-
-
Name Your Audience
Use a clear and descriptive name (e.g. Website Visitors – 30 Days). -
Click “Create Audience”
Meta will start collecting data, and the audience will be ready once it reaches a usable size.
Comparison: Facebook Custom Audiences vs Facebook Lookalike Audiences
| Aspect | Custom Audiences in Facebook Ads | Facebook Lookalike Audiences |
|---|---|---|
| Audience Type | Warm audience | New but similar audience |
| Data Source | First-party data (website visits, engagement, customer lists) | Source audience (custom audience) |
| Main Purpose | Retargeting and remarketing | Scaling and prospecting |
| Brand Awareness | Users already know the brand | Users usually don’t know the brand |
| Conversion Rate | Higher | Lower than custom audiences but higher than broad targeting |
| Cost Per Acquisition (CPA) | Lower | Moderate |
| Marketing Funnel Stage | Middle and bottom of the funnel (MOF / BOF) | Top of the funnel (TOF) |
| Level of Control | High (events, pages, retention period) | Medium (audience size percentage) |
| Best Use Case | Driving conversions and ROAS | Expanding reach and growth |
| AI Dependency | Limited | High (powered by Meta AI) |
Benefits of Custom Audiences in Facebook Ads
-
Retarget users who already showed interest
-
Higher conversion rates
-
Lower advertising costs
-
Precise audience segmentation
-
Ideal for sales and lead generation campaigns
-
Reduces wasted ad spend
Benefits of Facebook Lookalike Audiences
-
Reach new users similar to your best customers
-
Scale winning campaigns efficiently
-
Better performance than broad interest targeting
-
Flexible audience size (1%–10%)
-
Strong support for business growth
-
Continuously optimized by Meta AI
Which One Should You Use?
There is no “better” option—the best strategy is using both together.
Smart strategy:
-
Use Custom Audiences for retargeting and conversions
-
Build Lookalike Audiences from high-quality custom audiences
-
Test performance and optimize
-
Scale budgets based on results
Nofal SEO Recommendation
At Nofal SEO, we combine custom audiences and lookalike audiences within a full-funnel strategy to deliver higher ROAS, scalable growth, and data-driven advertising success.
Custom audiences in Facebook ads help you reach warm users, reduce ad costs, and drive higher conversions when used strategically. At Nofal SEO, we build data-driven audience strategies that turn engagement into measurable results. Contact Nofal SEO today and start converting the right audience.
Do you need a consultation about this topic?
Contact on WhatsApp
