
Book a Free Consultation Now
Would you like to know more about this topic?
Contact us on WhatsApp and get a free consultation from our experts
Contact on WhatsApp NowFacebook Pixel is a tracking code created by Meta that allows businesses to monitor user actions on their websites after interacting with ads, such as page views, purchases, and form submissions. It helps advertisers measure conversions, optimize ad performance, and build targeted remarketing audiences based on real user behavior. At Nofal SEO, we use Facebook Pixel data to create smarter, high-performing ad campaigns driven by accurate tracking and insights.
What Is Facebook Pixel?
Facebook Pixel is a tracking tool provided by Meta that allows website owners to collect detailed data about user behavior after they interact with ads. Facebook Pixel works by placing a small JavaScript code on your website that records actions such as page views, button clicks, purchases, and form submissions, helping advertisers understand how users move through the site and which actions they complete.
This tracking mechanism plays a key role in improving advertising performance because it connects ad interactions with real on-site behavior. By analyzing this data, businesses can measure conversions accurately, optimize campaigns based on real results, and build remarketing audiences that focus on users who have already shown interest rather than targeting random traffic.
Facebook Pixel is closely related to conversion tracking, remarketing strategies, and audience data analysis. It enables advertisers to create custom audiences, build lookalike audiences, and optimize ads for specific user actions instead of simple clicks. At Nofal SEO, we rely on pixel data to design performance-driven campaigns that improve targeting accuracy, reduce wasted ad spend, and turn visitor behavior into actionable marketing insights.
The main functions of Facebook Pixel include:
- Tracking user actions across different website pages
- Measuring conversions from Facebook and Instagram ads
- Creating custom and lookalike audiences
- Optimizing ads for high-value actions
- Improving campaign performance through data insights
- Supporting advanced targeting and retargeting strategies
Steps to Create a Facebook Pixel
Creating a Facebook Pixel is a structured process that starts from your Meta Business account and ends with generating a unique tracking code for your website. Facebook Pixel is created inside Business Manager, where advertisers define the data source that will be used to track website activity and connect it with ad accounts for measurement and optimization purposes.
The setup process ensures that the pixel is properly linked to the correct business assets, such as ad accounts and domains. Once created, the pixel becomes the foundation for tracking conversions, building audiences, and optimizing ad delivery based on real user actions rather than assumptions or estimates.
The process of creating a pixel is connected to Meta Business Manager, data source configuration, and ad account integration. It requires assigning the pixel to the correct business assets, setting permissions, and preparing it for installation on the website. This structured setup helps ensure accurate data collection and prevents tracking conflicts or data loss later.
The main steps to create a Facebook Pixel include:
- Accessing Meta Business Manager and opening Business Settings
- Navigating to Data Sources and selecting Pixels
- Clicking “Add” to create a new pixel
- Naming the pixel and associating it with the correct business
- Assigning the pixel to one or more ad accounts
- Preparing the pixel for installation and event tracking
Install Facebook Pixel Manually
Installing the tracking code manually is one of the most reliable methods to ensure accurate data collection across all website types. Facebook Pixel manual installation involves copying the base code generated in Meta Business Manager and placing it directly inside the website’s source code, specifically within the <head> section of every page you want to track.
This method gives full control over how and where the pixel fires, making it ideal for custom-built websites or platforms that do not rely on plugins. Once the code is added correctly, the pixel starts tracking user actions such as page views and visits, allowing advertisers to validate installation and begin collecting behavioral data immediately through the Events Manager.
Manual installation is closely associated with JavaScript tracking, header code integration, and website source control. It ensures compatibility with all website platforms, avoids plugin conflicts, and allows advanced customization for tracking logic. At Nofal SEO, we prefer manual pixel installation for performance-focused projects because it guarantees clean data, accurate event firing, and stronger foundations for conversion optimization and remarketing campaigns.
The key steps for manual Facebook Pixel installation include:
- Copying the base pixel code from Meta Business Manager
- Accessing the website’s control panel or source files
- Pasting the code inside the
<head>section of the website - Saving and publishing the changes
- Testing the installation using Pixel Helper
- Verifying active tracking inside Events Manager
![]()
Create Facebook Pixel
- From the Campaigns page at the top left of the page, we click on All Tools.
- Then we select “Business Setting” as we see:
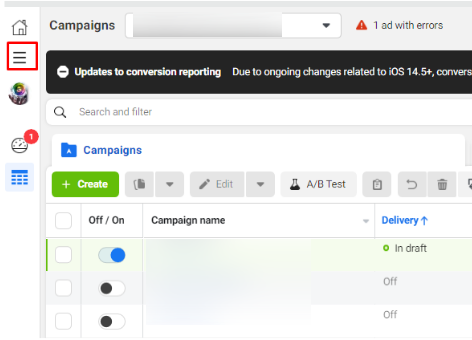
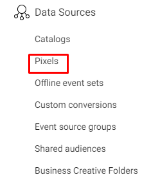
- After that, several options appear for us to choose the “Data Sources” as we can see:

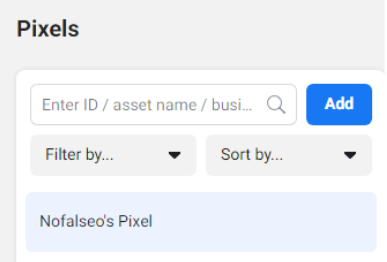
- From the “Data Sources” you will see several options from which to choose the “Pixels” as we see:
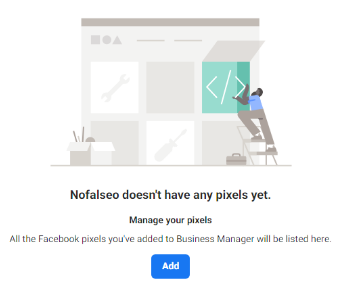
- You should see a page with all the pixels on your Facebook account.
- It also shows you the previous set of pixels that were created.
- But in order for us to be able to create the pixel, follow these next steps with me. Note that you can add the pixel that you have added to any “Ad Account”, and it is also possible that the “Ad Account” contains more than one pixel, and you can add 100 pixels per account.
Steps to create a Facebook Pixel
- First, we click on “Add”, as we can see:
- After pressing “Add”, you will see a page that will fill in the data to start adding Facebook a pixel inside it, as we see:
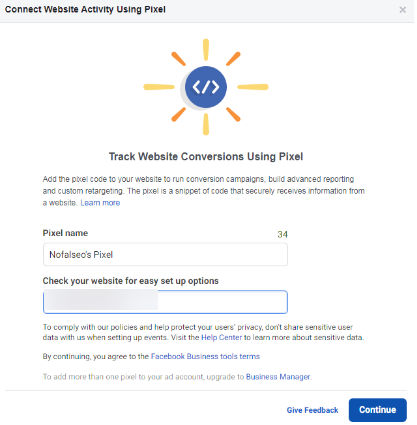
- The name of the pixel is “Nofa seo PIXEL”.
- Then it asks you for the name of the site you want to add the Facebook pixel to, and this choice is not mandatory, it is only to determine the way the site works.
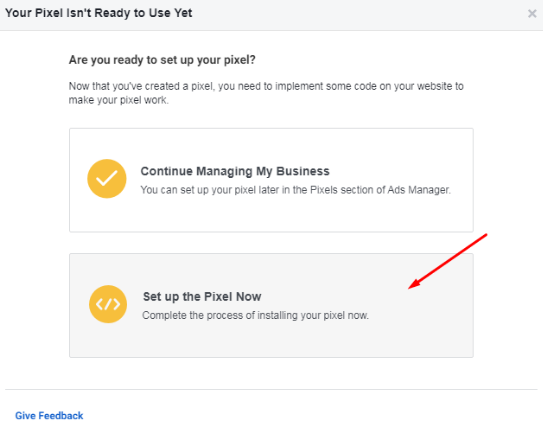
- After that, a page appears with two options:
- Continue Managing My Business
- Set up the Pixel Now.
- We choose the second option as we see:
- Another screen appears, as shown:

- In it, Facebook offers you to add additions to the site after you know how it works.
- But it is better to use “Manually” because it is compatible with all sites, whatever the way they work, as it is a fixed method.
- After pressing “SET UP MANUALLY”, a page titled “Install Pixel” appears, as we can see:

- We take the above code “Copy” and go to the site we want to add Facebook pixel to, note that you must be the one who created the site so that you can modify inside it. In the event that there is another person who created the site, give him the pixel to add it to you on the site.
- After entering the site from the “Control Panel”, we choose from the left of the site the choice called “Appearance” or “Theme Editor”.
- The code for the site appears under the title “Astra: style.css” from the title called “Files Theme” or template files on the left of the page, we choose the “Header” from the list.
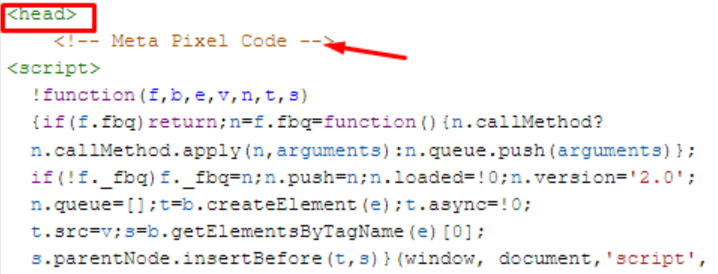
- On this page we find the <Head> which is the opening of the “Header tag” is we find </Head> which is the lock of the “Header tag “is a language specific to the “xml”.
- After the word “Head” we put the pixel code anywhere, let it be immediately after the “Head” as we see:
- Then we update the file to save the changes we made.
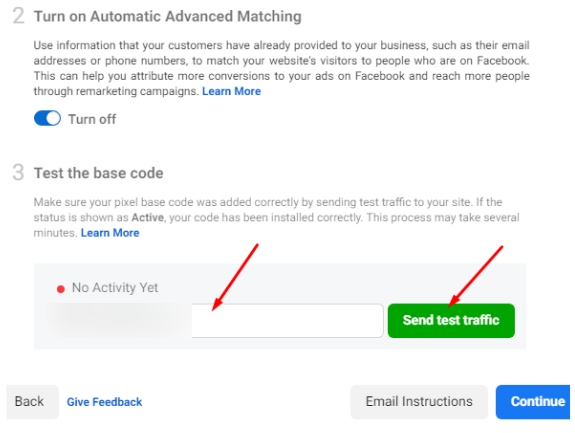
- We go to the “Install Pixel” page in Facebook Business again, and we find that the pixel is still not working, and it has not been “Activate”.
- We put the “URl” of the site to which Facebook was added a pixel at the bottom of the page.
- Then we click on “Send Test Traffic” as we see:
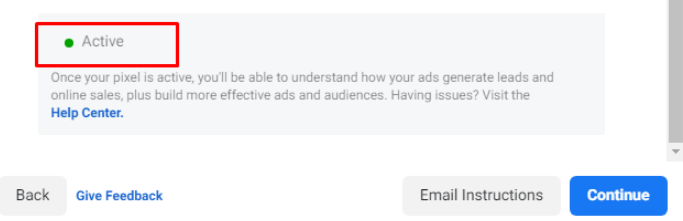
- After that, the site is opened to see if users are logged in or not.
- By referring to the “Install Pixel” page on Facebook Business, we find that the Facebook Pixel has already been added, as we can see:
This is the first step in adding Facebook pixel. Because I didn’t specify which events I want Facebook to track pixelated. Is it users visiting or entering a specific page.
The other steps
- Click on “Continue” and complete the rest of the steps for adding Facebook pixels.
- After pressing “Continue”, the “Set Up Events” page appears, as we can see:

- On this page, you will be asked to select the events you want to track, and this is done by clicking on “Use Facebook’s Event Setup Tool – Recommended”.
- Another page appears with the same title “Set Up Events” asking us to put the “URL” of the site as we see:
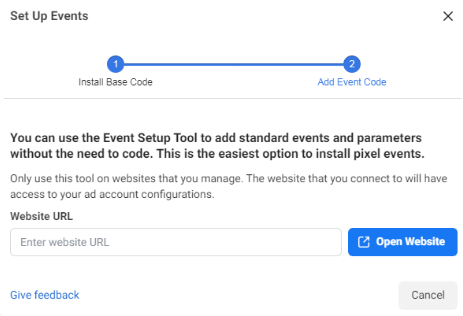
- After typing the site address, we click on “open website”, and it opens the site, but it has a new window with a program called “Event setup tool” through which I will follow what I want inside the site as we see:

- Inside this window are two options, which are “Track new Bottom”, which is to track any button on the site by simply pressing it
- or “Track a URL” which is a tracking of the URL itself.
- If you choose “Track new Bottom” and click on it, it will select all the buttons on the site.
- For example, choose any button on the site and it will be added, and a message will appear to choose the button and confirm the choice, as we see:
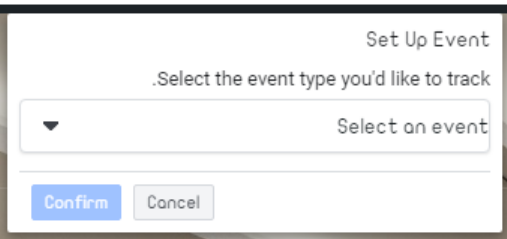
- After we have made the selection, it will appear in the program list, as we can see:
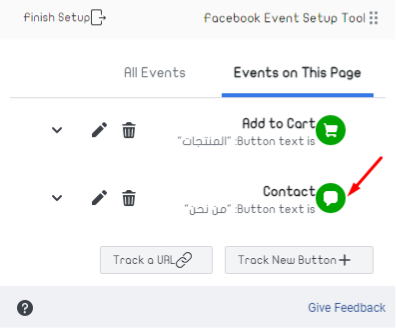
- In this case, if the user presses the Add to cart button that you selected, he will be tracked.
- It is possible to add more than one “Track”, for example, add the (About Us) button and choose the appropriate event for the (About Us) page, and let it be, for example, contact, so anyone who clicks on Who We are will be tracked as we see:
- We can also track the “URL”. We click on “Track a URL” and select the appropriate “Event” and let it be “View Content” so anyone who will enter the site and see the content will be tracked and recorded in the “View Content” list, as we see:
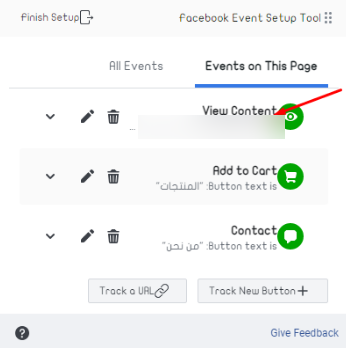
- After you have finished adding all the “Events” that you want, click on “finish” as we can see:
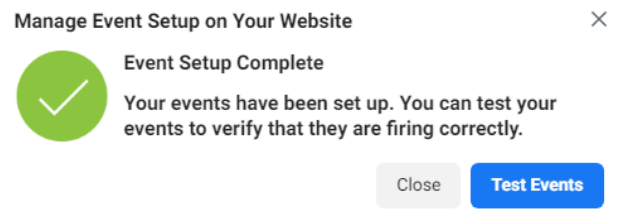
- Returning to the Facebook Business page, Facebook will show us the pixel that was added with the name “Nofal seo’s Pixel” as we see:
Now the Facebook pixel has been successfully added to the Facebook Business account. You can add “Events” or modify the pixel as you want. This step is done through the “Event Manager” and with this we have finished the article and in the next article we will learn about the event manager on Facebook.
Facebook Pixel Manager
Facebook Pixel Manager, also known as Events Manager, is the central dashboard where advertisers monitor and manage all pixel activity. Facebook Pixel data appears inside this tool, allowing users to track events, verify data accuracy, review conversion activity, and diagnose tracking issues across websites connected to the pixel.
Through Pixel Manager, advertisers can see real-time events, historical data trends, and performance signals that indicate whether the pixel is firing correctly. This visibility helps ensure that tracking is accurate before relying on the data for optimization, retargeting, or conversion-based campaigns.
Facebook Pixel Manager is closely connected to event tracking, data diagnostics, and conversion measurement. It provides tools for event testing, error detection, and data validation, helping advertisers maintain clean and reliable tracking. Using Pixel Manager correctly is essential for making informed decisions based on actual user behavior rather than incomplete or inaccurate data.
Key functions of Facebook Pixel Manager include:
- Monitoring real-time and historical pixel events
- Verifying correct pixel installation and activity
- Managing standard and custom events
- Diagnosing tracking errors and warnings
- Reviewing conversion performance data
- Ensuring data accuracy for ad optimization
Facebook Pixel Conversion API
Facebook Pixel Conversion API is a server-side tracking solution that sends website events directly from the server to Meta instead of relying only on the browser. Facebook Pixel Conversion API helps overcome data loss caused by browser restrictions, ad blockers, and privacy updates, ensuring more accurate and reliable event tracking for conversions and user actions.
By using server-side tracking, advertisers can maintain consistent data flow even when browser-based tracking is limited. This improves attribution accuracy, strengthens optimization signals, and allows Meta’s algorithm to better understand user behavior across devices and sessions.
Conversion API is closely linked to server-side tracking, data privacy compliance, and advanced conversion measurement. It works alongside browser-based pixel tracking to create a more complete data picture and reduce tracking gaps. At Nofal SEO, we integrate Conversion API with existing pixel setups to improve data accuracy, enhance campaign optimization, and protect tracking performance in privacy-focused environments.
The main benefits of Facebook Pixel Conversion API include:
- More accurate conversion tracking
- Reduced data loss from browsers and ad blockers
- Better optimization signals for ad delivery
- Improved attribution and reporting accuracy
- Stronger compliance with privacy regulations
- Enhanced performance for conversion-focused campaigns
Facebook Pixel Google Tag Manager
![]()
Using Google Tag Manager to deploy tracking scripts provides a flexible and scalable way to manage website tags without editing source code repeatedly. Facebook Pixel can be implemented through Google Tag Manager by adding the base pixel code as a custom HTML tag, allowing centralized control over when and how tracking fires across different pages and events.
This method is especially useful for websites with frequent updates or multiple tracking tools, as it reduces dependency on developers and minimizes implementation errors. Once configured correctly, Google Tag Manager triggers the pixel based on predefined rules such as page views, button clicks, or custom events, ensuring consistent data collection and easier maintenance.
This setup is strongly associated with tag-based tracking, event triggers, and container-based management. It enables faster deployment, better version control, and simplified testing workflows across marketing tools. At Nofal SEO, we often recommend Google Tag Manager for managing complex tracking environments because it keeps pixel implementation clean, scalable, and easy to optimize as campaigns grow.
Key advantages of using Facebook Pixel with Google Tag Manager include:
- Centralized management of tracking tags
- No direct code changes required on the website
- Flexible trigger and event configuration
- Easier testing and debugging of pixel events
- Improved scalability for advanced tracking setups
- Better control over tracking performance and accuracy
In conclusion, Facebook Pixel is an essential tool for tracking user behavior, measuring conversions, and improving ad performance through accurate data. When implemented and optimized correctly, it helps businesses make smarter marketing decisions and maximize return on ad spend. If you want to set up Facebook Pixel the right way and turn tracking data into real results, contact Nofal SEO today and let our experts handle it for you.
Do you need a consultation about this topic?
Contact on WhatsApp