

Book a Free Consultation Now
Would you like to know more about this topic?
Contact us on WhatsApp and get a free consultation from our experts
Contact on WhatsApp NowCreate store addresses on Facebook
In order to do this kind of ads that direct viewers to real places of sale. We must first define our “Stores” and specify the address of each of our branches. To Create store addresses on Facebook, we follow the following steps:
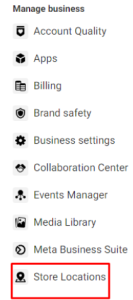
- First, from the Campaigns page, we click on the “All Tools” button. We choose the so-called “Store Location” as we see:
To start creating store addresses on Facebook for our branches, the following page appears with the title “Store Locations” for locating the different branches. The point here is that it is assumed that this page is the home page of the brand or chain of cardboard stores, as in our example, and from this home page we create sub-pages. Each of those sub-pages has the title of a specific branch, for example, writes the name of the library furniture exhibition and next to it (Cairo branch )And so on.
- From the top right of the page called “Store Locations” we choose the name of the page we are working on as we see:
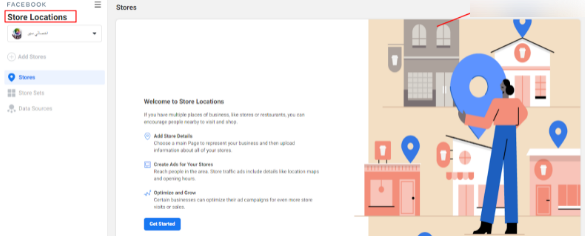
- From the same page, we click on “get started” and choose our page
Then another screen appears, from which we click on “go to stores” as we see:
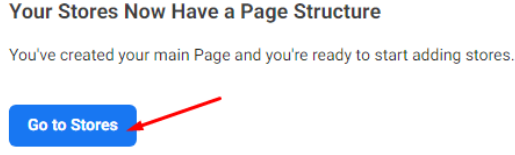
“Stores” page
- We Create store addresses on Facebook for our branches, from which we click on “Add store” and then click on “next”.
- Then a screen appears with more than one way to create “Stores”, as we see:
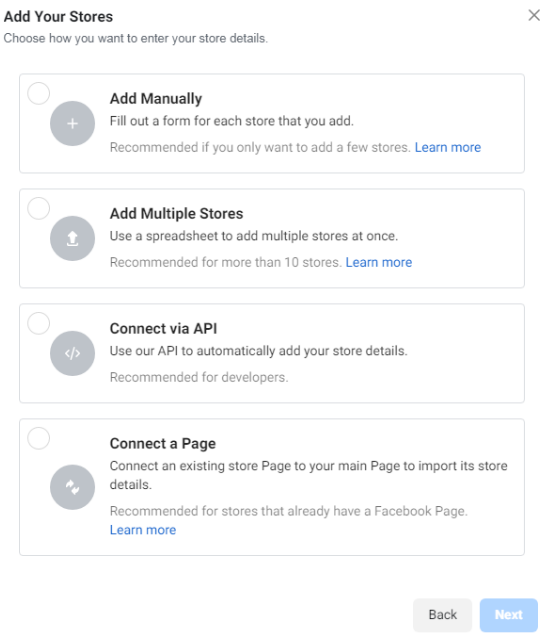
- These options are the first option, which means manual creation of “Stores” addresses.
- The second means that there is an Excel sheet with addresses and data for the “Stores” that you download once.
- The third option is a programming option.
- The fourth is a page containing the titles of “Stores”.
- We will choose the first option, which is “Add Manually” and then click on “Next”.
- Another page appears titled “Add a Store” that writes the data of the branch you select, as we can see in the picture:
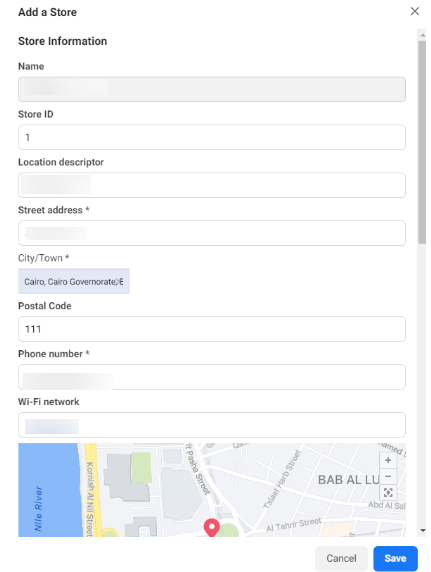
Then we complete the rest of the “Page Information”, in which you specify the “User name”, the type of branch activity, and the number of hours during which the branch is open. The method of delivery of products, is it inside or outside the branch, is the price of your products specified or not, as we can see in the picture:
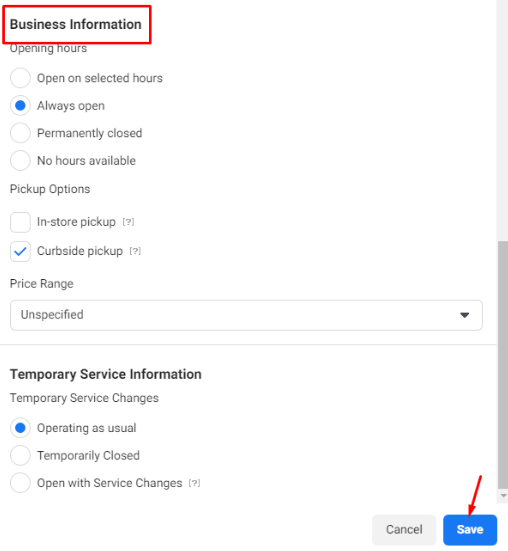
- Determine everything. When creating store addresses on Facebook, we click on “Save” and so the first branch is selected, as we can see:
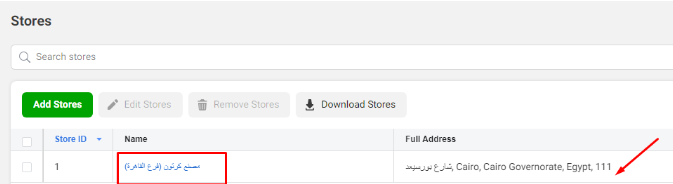
- We can create more than one branch in the same way as before, as we can see:

- We can also create groups or “sets” for these branches, so that I can make an advertisement for Cairo branches, for example, once. To do this, click on the “store sets” button.
- Another page appears, we click on the “Create store sets” button, but note that these groups will be linked to the “Ad Account”, so you must choose the account you want to work on from the top left of the page as we see:
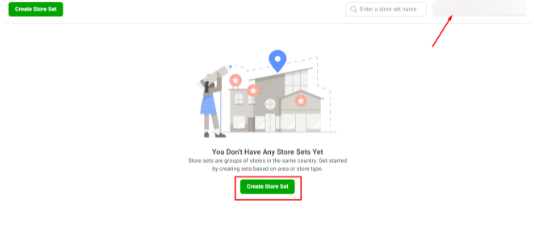
- By pressing the “Create store sets” button, a screen appears.
- First, we choose the “store” as described above, after pressing “Continue”.
- A screen appears that prompts us to specify the area or perimeter of the branch we are working on. There is a choice called “Automatic Radius” by clicking on it. It determines the perimeter of the branch as we see:

- Then a screen appears asking you to specify the name of the “Set” and then press “Create” as we see:
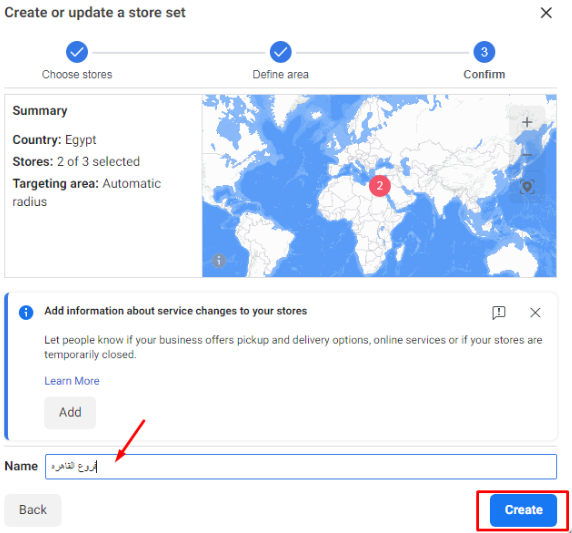
- Now we have a group called Cairo Branches, as we can see:

So we are done and we have created a home page and other sub-pages, and we have created the Facebook store addresses inside them. In the following, we will learn about creating ads for store visits on Facebook.
What Are Store Locations on Facebook?
Store locations on Facebook are individual location-based pages that represent each physical branch of a business under one main brand page. These pages are designed to help customers find nearby branches with accurate local details such as address, phone number, opening hours, and directions. Create store addresses on Facebook allows multi-location businesses to organize all their branches under one central Page structure, making it easier to manage local presence while maintaining brand consistency across all locations.
From a growth and visibility perspective, store locations play a major role in local SEO, location-based discovery, customer trust signals, map search visibility, and local brand authority. Each location page can appear in search results and supports customer reviews, check-ins, and geo-targeted engagement, which helps businesses attract nearby customers and improve offline conversions through accurate and localized information.
To understand how store locations work within Facebook’s ecosystem, here are the key elements that define them:
-
Main (parent) Facebook Page structure
-
Child location pages linked to the brand
-
Local business information accuracy
-
Customer reviews and check-ins per location
-
Search and map visibility for nearby users
How to Create Store Locations on Facebook?
Creating store locations on Facebook requires setting up a proper Pages hierarchy that connects every physical branch to one main business Page. This structure allows Facebook to treat each branch as a unique location while preserving unified branding. Create store addresses on Facebook is done by enabling location settings inside Business Manager and adding each store with its exact address, contact details, and operating hours.
From an execution and optimization standpoint, the process relies heavily on Facebook Business Manager setup, Pages structure management, bulk location upload, location permissions, and data consistency across Pages. A correct setup prevents duplicate Pages, improves local search performance, and enables location-based advertising, allowing businesses to scale their presence while keeping full control over updates and branding.
To create store locations correctly and avoid common setup issues, follow these steps in order:
-
Enable the Locations feature for the main Facebook Page
-
Access Locations inside Business Settings
-
Add locations manually or upload them in bulk via CSV
-
Assign accurate addresses, phone numbers, and hours
-
Review and publish each location Page
-
Verify that all locations are linked to the main Page
How do I add a business address to a Facebook page?
Adding a business address to a Facebook page is a fundamental step to ensure customers can easily find, contact, and visit your physical location. A correctly added address helps Facebook understand where your business operates and improves visibility in local searches and map results. Create store addresses on Facebook allows businesses to attach accurate location data to their Pages, which directly supports customer discovery, check-ins, and location-based interactions across Facebook and Instagram.
From a professional setup perspective, this process becomes more effective when handled strategically. This is where Nofal Seo supports businesses by ensuring address accuracy, proper Page configuration, and alignment with Facebook’s location requirements. A correctly added business address strengthens local visibility, improves customer trust, and enables geo-targeted advertising, all while preventing common issues such as duplicate Pages or incorrect map placements.
From an optimization and visibility standpoint, adding an address impacts local SEO, map-based discovery, business credibility, location signals, and search relevance. When your address data is consistent and complete, Facebook can confidently show your Page to users searching for nearby services, increasing foot traffic and engagement from high-intent audiences.
To add a business address to a Facebook page correctly, follow these detailed steps:
-
Open your Facebook Page with admin access
-
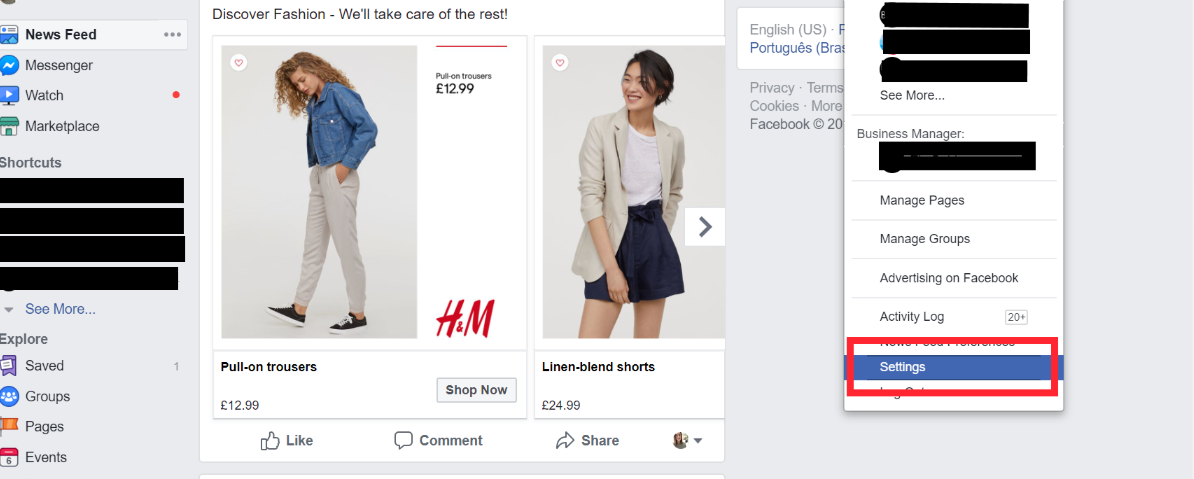
Go to Page Settings
-
Select Page Info from the left menu
-
Enter the full business address (street, city, postal code)
-
Adjust the map pin to the exact location if needed
-
Save changes and review how the address appears publicly
How to create a location page?
A location page on Facebook is a dedicated Page created to represent a specific branch or store under a main business Page. These Pages allow businesses to manage multiple physical locations while maintaining a unified brand identity. Create store addresses on Facebook is a core part of this structure, as each location page contains its own address, contact details, and local information while staying connected to the parent Page.
From a technical and management perspective, location pages are built using Facebook’s Pages structure and location settings. This setup supports multi-location management, local customer engagement, branch-level visibility, review collection, and location-specific content publishing. Each location page can appear independently in search results, giving businesses stronger coverage across different geographic areas.
To create a Facebook location page properly, these steps should be followed in order:
-
Ensure you have a main Facebook Page set as the parent Page
-
Access Facebook Business Manager
-
Navigate to Business Settings → Locations
-
Enable the Locations feature for the main Page
-
Add a new location manually or via bulk upload
-
Assign address, phone number, and operating hours
-
Publish the location Page and verify its public visibility
Do you need a consultation about this topic?
Contact on WhatsApp