
advertising center for Better Advertising Results
Book a Free Consultation Now
Would you like to know more about this topic?
Contact us on WhatsApp and get a free consultation from our experts
Contact on WhatsApp NowAd Center
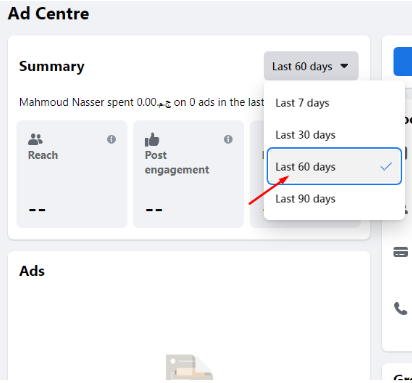
the Ad Center is one of the easiest ways for beginners to make ads. This is because each page has a “Local” ad center at the page level, meaning that each page has a free ad center. If we enter the page under the explanation now (Nofal SEO), we will see the “Center Ad” selection as we can see from the image:

- By clicking on the “Ad Center”, a blank page will appear for us because there are no previous advertisements that have been made, but if there are advertisements, you will find “Summary” any summary of the last 60 days of this page as we see:
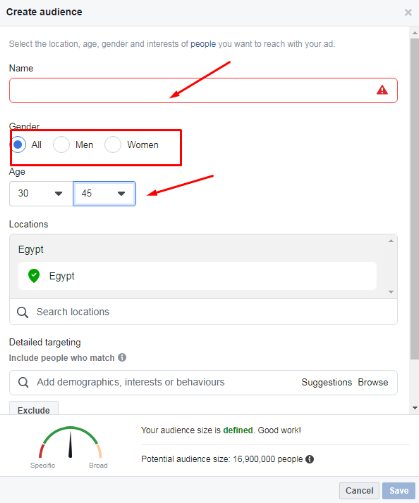
- First we click on the “Create audience” button.
- First we name the audience and suppose we call it (Course Nofal Seo).
- We determine the type of audience we want to target, whether it is men, women or everyone.
- Then we choose the age we want to target, let’s say, for example, 30 to 45.
- Then we specify the place in the “Location”, let it be, for example, Egypt and Saudi Arabia.
- Finally, click on the “save” button.
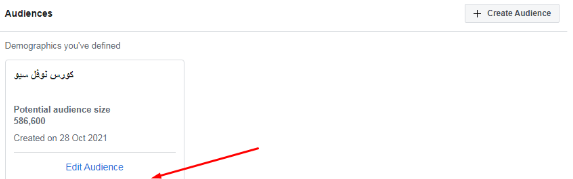
- Now you have a ready and saved audience named (Nofal Seo Course). In case you want to use those specifications that you specified in advance, you can use it easily as we see:
- Click on the “Audience Edit” button.
- We change what you want.
- Then we click on the “Update Audience” button, as we can see in the picture:
How to create an ad?
- Click on “Ad Center” or “Ad Center” from the left side of the page.
- Then click on the “Create Ad” box at the top of the right box.
- After that, a page called “Choose a goal” appears, which asks you about the goal of the advertisement, among the questions is the question “Get more messages” Are you making this advertisement in order to receive messages, click on this option and a page with this title, Get more messages, appears.
- We find that on the left side it asks for a description of the details or the description. We can write any sentence we want.
- Below is “Heading” which is the name of the page. So we write inside this “Heading” the text we want as well, and let it be (50% discount on Nofal Seo course) under the name “MESSENGER”.
- Then he asks about the “Special Ad category”, meaning does this ad have anything to do with politics or economics.
- The next step is the “Audience”, meaning what audience do you want to target by displaying this ad to, on this page it displays the names of the audience that you previously created under the name (Course Nofal Seo).
- He asks about the hypothetical daily budget and here you specify the amount you want, for example, 4 dollars.
- Then he asks where I want to publish the ad, showing you the three options “Facebook, Instagram Messenger”, you can publish the post on the three platforms.
- You can change the images, and you can also add 5 different images, in this case it is a “Carousel” or a carousel, which is a display of a group of adjacent images that the viewer can view consecutively.
- Then he asks: Do you want to make this ad specific or directly? Select “Run this ad Continuously”.
- Click on the “Media Select” button to add the images, a page with its title with the same name appears, and then we click on the “Upload” button to download the images we have saved on the computer, and a page appears containing many images.
- We choose one of these images and press the “Open” button, a page titled “Browse Media” appears, and from the “Upload” button on this page, we choose another image and press the “Open” button, and the next page appears containing the uploaded images.
- You can choose photos up to 5 photos, which is the final number, and you can close this photo through the (X) mark.
- For each of the images that have been “selected”, we can change the “Heading”.
- After that, we click on the “Now Promote” button, and the advertisement for the image appears, and then we click on the “Go To Ad Center” button or the advertisement center.
- Returning to the page titled Center Ad, we find on this page the phrase “review In”. That is, it is still in the review stage, after which the advertisement is approved and work begins immediately.
- In the event that you want to create another advertisement, click on “Ad Create” and on the page titled “goal a choose”, which we touched on previously, click on “post Boost” and a page with the title “a Select boost to post” appears, from which we choose one of the existing posts On our page to start a business that has the process of promoting and pushing publications.
- There is another option called “Page your Promote”. It is just an advertisement from which we bring likes to the page, that is, not on a specific post, but all the purpose of it is to bring likes.
- When you click on the “Like” sign, the exact same data for the page appears, and by clicking on this sign, a like on the page appears, we close and a confirmation message appears entitled “Confirm”, press the “Yes” button.
- Another option “Get more leads” is to collect data from customers. We use this option in the event that you want to make an announcement about a specific course that starts on a certain day, and the one who needs this course must be registered, so click on this option
- Thus, as we can see above, the advertisement is sent for review “Created your ad is being”.
- After that, we click on the “Go to ad Center” button, and it is returned to the ads center in the “In review” stage, which is the stage of reviewing the advertisement to be approved.
- When you click on the “View Results” button, a page with the same name will appear. Supposed when making this ad, it shows the number of “leads” or data that it has collected, we can take it in an excel sheet. So we have all the data that you can send to your sales department to start dealing with it and determine its plans based on that data.
- Facebook here wants to inquire about a set of questions so that it can improve your ads and your activity. Here we begin to answer several questions Facebook asks us, including:
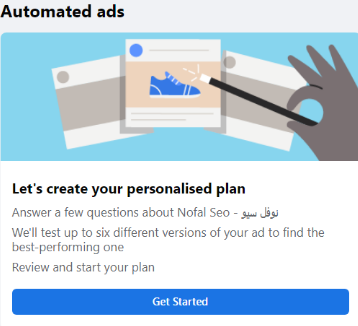
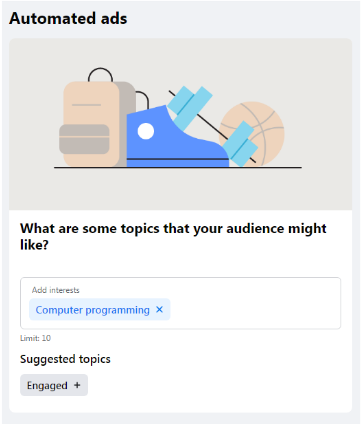
- First, after pressing start or “get start”, a screen with the name “Automated ads” will appear.
- You will find in it a question asking you: Do you want people to come to your workplace, of course, we will answer with no or no. This is because we work online and do not want anyone to attend, as we can see:
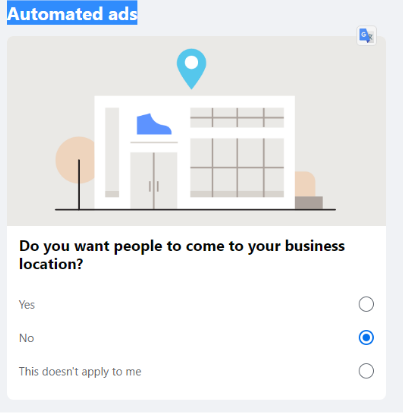
- Then we click on “Next”.
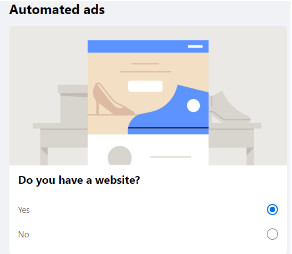
- Then a screen with the same name will appear to you asking if you have a “Website”. Of course, the answer is yes or “yes” as shown in the picture, then we press “next” as we can see:
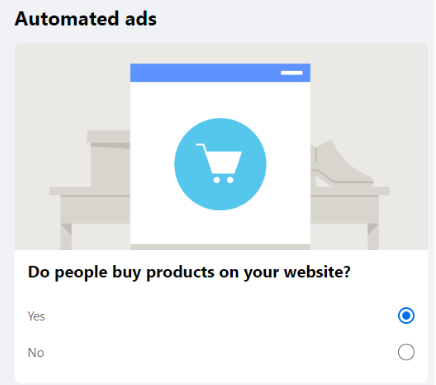
- After that, another window appears asking if people buy your products. Choose yes and then click on next or next as we see:
- Completing the rest of the questions, another window will appear with a question: Do people book appointments on your website? We answer “No” because we do not have this feature, then we click on “Next” as shown:

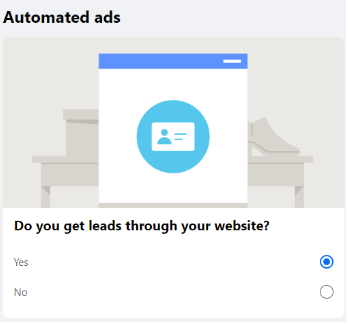
- Then another window appears with a question: Do you get leads through your website? You can answer yes if there is another place from which you get customers as shown and then press “next” as we see:
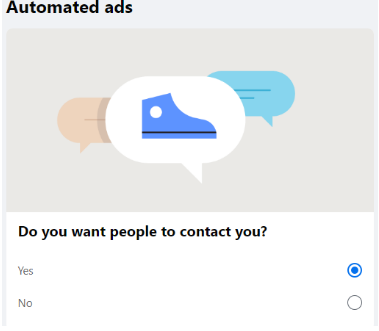
- Then the next question comes and asks: Do you want people to contact you? Of course, the answer is yes, then click on the next or “next” button, as we can see:
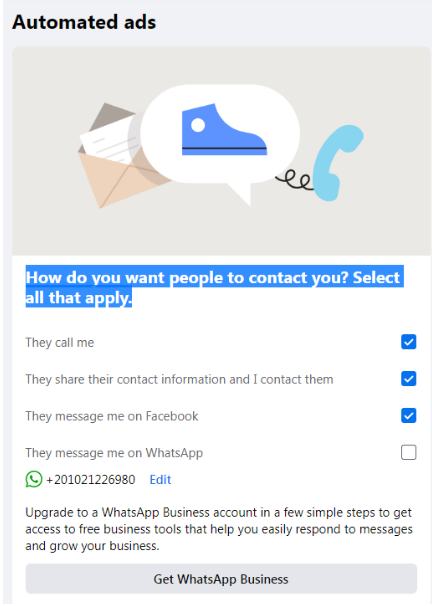
- Then the question arises of how do you want people to contact you? Choose all the options as shown in the image and then click on Next or “next”:
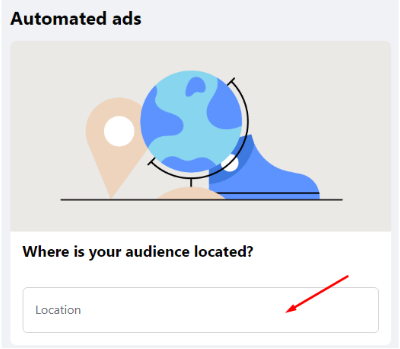
- Where is your audience located is the next question? Select the area you are targeting as shown and then click Next or “next”:
- Then comes the question: What are some topics that your audience might like? In this question, you have the place to specify the interests of your audience, which amounts to 10 interests, as shown, and then click on the next or “next” button:
- Another window appears in which it asks me about the presence of a “6 Version” of the advertisement, i.e. 6 images are available, and there is an image on the page.
- You can add an image by pressing the “Add” button, and a window will appear containing the images titled “Media Browse”.
- We choose several photos by selecting them and press the “Select” button, then the 6 photos will appear, then we press “next”.
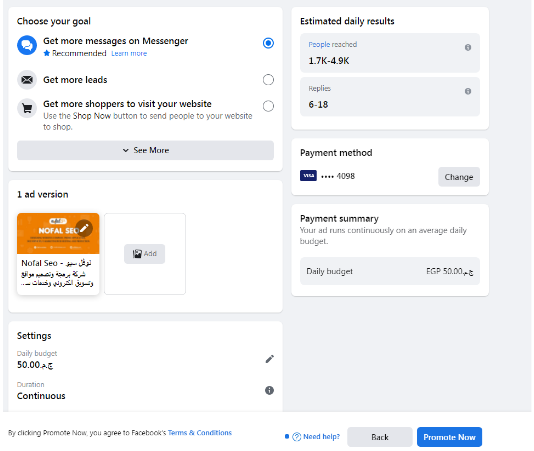
- A window appears with the daily budget and how many days the ad will remain running. We click “Promote now”.
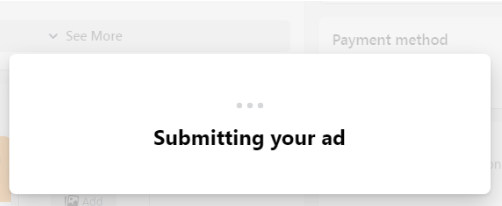
- Then it starts downloading, as we can see:
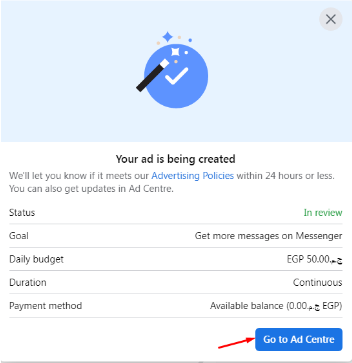
- Here, at this stage, he submits the advertisement for review, as previously mentioned. After that, a window appears titled “your ad is created” stating that it has been executed.
- Then we click on “go to Ad Center” as shown in the image:
- After that we go back to the “Ad Center” and when you want to make an advertisement automatically, click on “Create Ad”.
- A window appears called “Choose a goal” and then we choose “Automated ads”.
- Then a window titled “Add to your advertising plan” appears, from which we click on the “Get Started” button. A window appears with everything and no other questions.
- If you want to change any statement of these questions, press the “Edit” button for the choice you want to change.
- Another window appears, from which we change what we want in it and then click on the Next button. The image window appears with the title Automated ads, we can close some images by pressing the ( x ) button of the image. By pressing the “Add” button if we want to add images.
- In the event that we want to modify, pause or cancel the advertisement completely, we return to the “Ad Center” by pressing the Back arrow at the top left of the page.
- We find the advertisement that we made with the phrase “Active” and next to it are three dots (…). When we click on these points, we see two options, namely “Edit ad”, “Pause ad”, then we choose “Edit ad”, and the advertisement page appears, in which we modify as we want, and after completion, we press the “Save” button, and a message appears that is being saved.
- In case we want to go back to the “Ad Center”, it is by clicking on the three dots and choosing “Go to Ad Center”.
- In the event that we amend the advertisement, it will be reviewed again by sending a message for review with the phrase “In review”.
- If you want to pause the advertisement, click on the three dots in the “View Results” field. Options appear, from which we choose “Pause Ad” and a confirmation message appears, from which we choose “Confirm”.
- If we want to run it again, we click on “resume ad”, in this case it will run the advertisement again.
What do you do if you want to stop advertising work?
- In this case, you will go to your personal account.
- Then you go to the “Ads Manager” by clicking on it, it will show you all the ads that you have implemented, the “Ad Center”, we see some of them are disabled and some are working as we see in the picture.
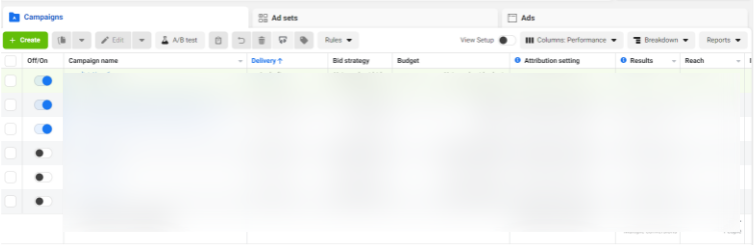
- You can turn off the paused by selecting the check box next to the ad you want to play.
- In the event that you want to cancel some or all of the ads, we click on the “Select” button. A message will appear confirming the number of advertising campaigns you want to clear. As it is shown in the picture.
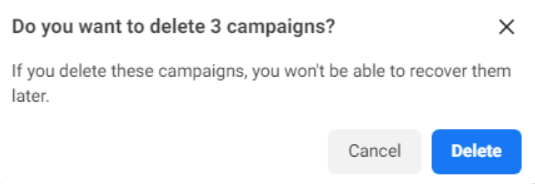
- From this window, we click on “Delete” and the ads are completely deleted, then a page appears stating that all ads have been deleted.
- Now you can make new ads better by returning to your personal account and clicking on the “Ad Center”, which is normal for beginners to use, but the possibilities are limited in an advanced stage. After you get to know “Ads Manager” and “Facebook business account” you will know It has more potential than you can imagine.
What is the ads center on Facebook?
The advertising center on Facebook is a simple tool that helps page owners create and manage ads directly from their page, focusing on ease of use for quick promotion.
-
Create ads directly from the Facebook page
-
Suitable for beginners and small businesses
-
Limited targeting and reporting options
Understanding Facebook Ads Manager
Understanding Facebook Ads Manager is important because it offers more advanced features than the advertising center, with campaign management as the main advantage.
-
Full control over campaigns and ad sets
-
Advanced audience targeting options
-
Detailed performance analytics
Key Differences Between Ads Manager and Ad Center
The key differences show that the advertising center focuses on simplicity while Ads Manager focuses on precision, with control level as the main distinction.
-
Ad Center is easier and faster
-
Ads Manager is more detailed and flexible
-
Each tool serves a different advertising stage
When to Use Facebook Ads Manager
Facebook Ads Manager should be used instead of the advertising center when campaigns need scalability, with campaign optimization being the key factor.
-
Managing multiple campaigns
-
Using custom and lookalike audiences
-
Tracking conversions and performance
Setting Up Your Facebook Ads Manager
Setting up Facebook Ads Manager comes after using the advertising center and focuses on account setup to ensure long-term ad stability.
-
Create a Business Manager account
-
Add payment methods
-
Connect ad accounts and pages
Facebook Ad Center vs Ads Manager Which is Best for Your Campaign
Choosing between Ads Manager and the advertising center depends on campaign goals, with campaign goals guiding the final decision.
-
Ad Center for simple awareness ads
-
Ads Manager for growth and scaling
-
Both tools can be used together
How do I get $500 credit from Google Ads?
Getting a $500 credit from Google Ads is not related to the advertising center, and depends mainly on ad credit offers for new accounts.
-
Available for new accounts only
-
Requires minimum ad spend
-
Limited-time promotions
What are the top 5 advertising agencies?
Top advertising agencies succeed by combining strategy and execution while using tools like the advertising center, with industry expertise being the key differentiator.
-
Strong digital strategy
-
Proven results and case studies
-
Multi-platform experience
Is $10 a day enough for Google ads?
A $10 daily budget can be enough for testing, similar to starting with the advertising center, where budget testing is the main objective.
-
Good for initial experiments
-
Limited reach
-
Requires smart optimization
Do you need a consultation about this topic?
Contact on WhatsApp